
I bare no responsibility for the outcome of using my guidelines, files, steps… etc., and the usage is merely your responsibility. My objective is to help/support a fellow tourist to get their visa picture done. Malaysian immigration is very strict on photographs. Hence, if you’re not too sure about this, I suggest you consult a professional to get this done.
Last year, I planned on a vacation trip to Malaysia and figured that my country (Sri Lanka) is listed as an online VISA (also known as eVISA) destination.
However, I am an expat resident living outside Sri Lanka and I saw no challenges according to the Visa proceadures, listed in Window Malaysia. This site is a premium eVISA website with a good support and proven records. In fact, this is the easiest and fastest way to apply online. Their VISA process usually take between 24 – 48 hours provided all your required documents are submitted properly.
Before we begin this, please ensure you are eligible to apply for the eVISA, Otherwise, I’m not sure if this will really be benefiting you. Also, I will capture the process of application as well preparing the documentation on a seperate post.
What was my real challenge?
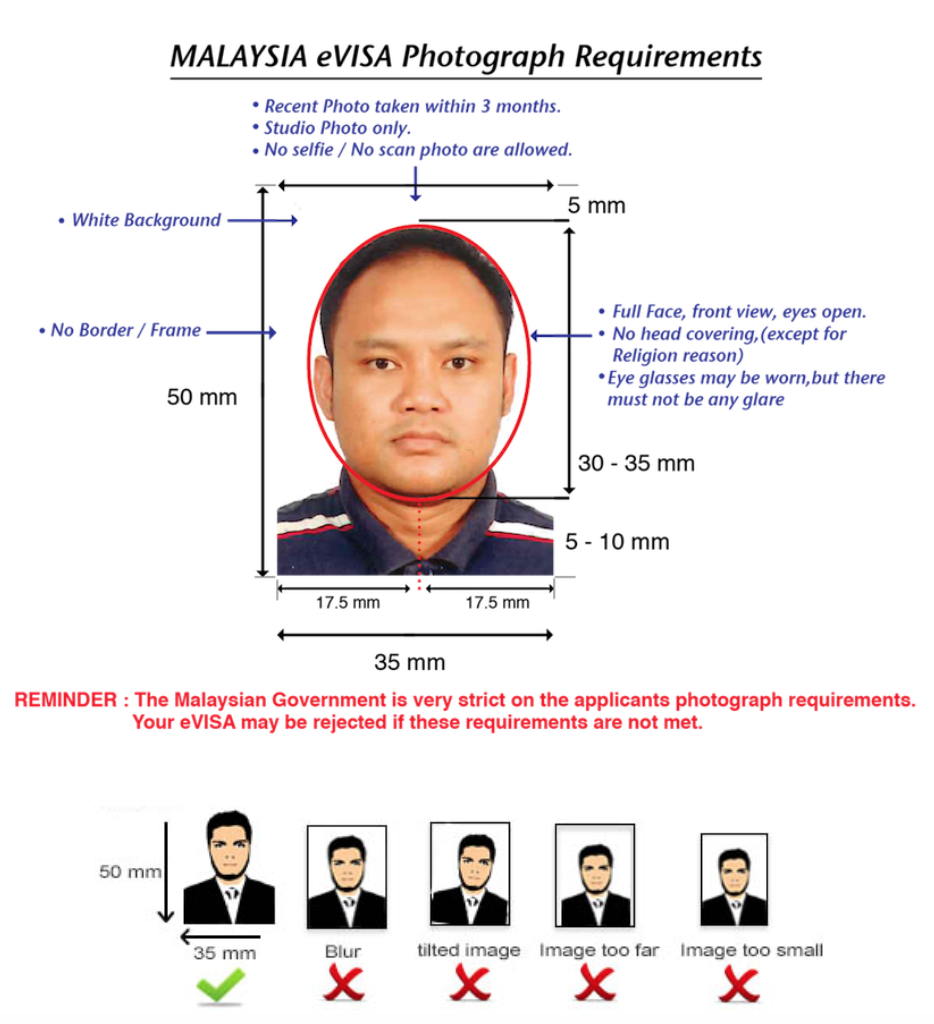
Photograph for the eVISA was a big thing (at least for me) as the immigration of Malaysia is very strict about it. One my friend had used a website to do this and was giving me scary answers not to upload any other. So the requirements are basically as seen below;
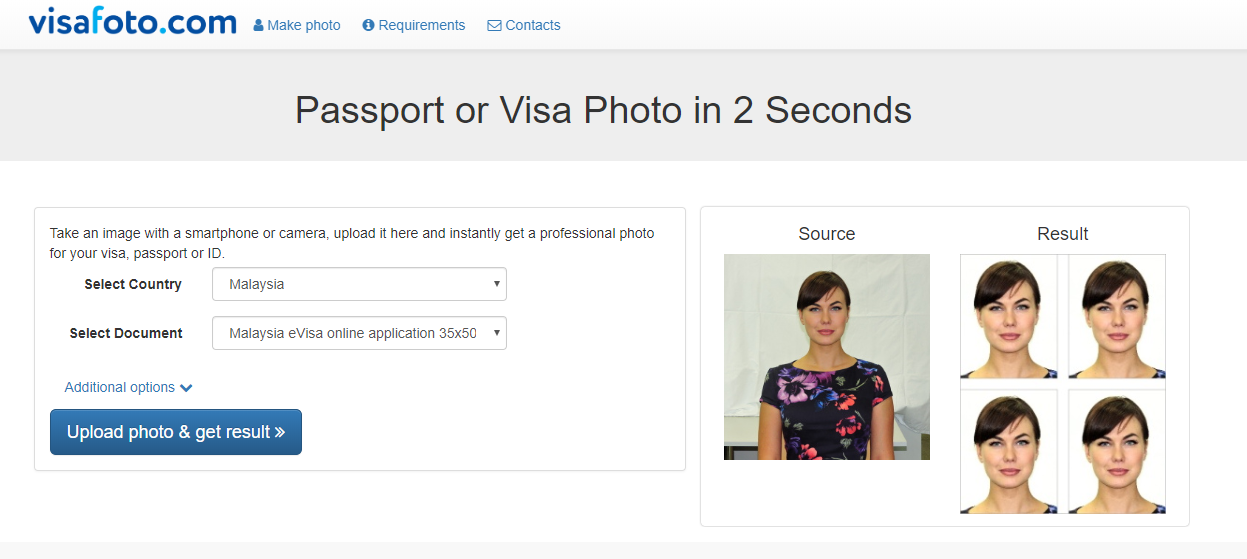
Well, indeed there are professional website who can help do this for a small fee and my favorite was visafoto.com. In fact, I follow the guidelines through the site, “thanks to them” and created my own image using Photoshop.
I challenged myself to see how difficult is this process going to be. So, I called my friend, asked him to send me the sample image which he processed through the site so that I can relate the pixels and DPIs to ensure I’m not taking chances. Viola! I managed to create a framework and used that image to process the VISA. Both my wife and my VISA got approved.
How did I manage with image processing?
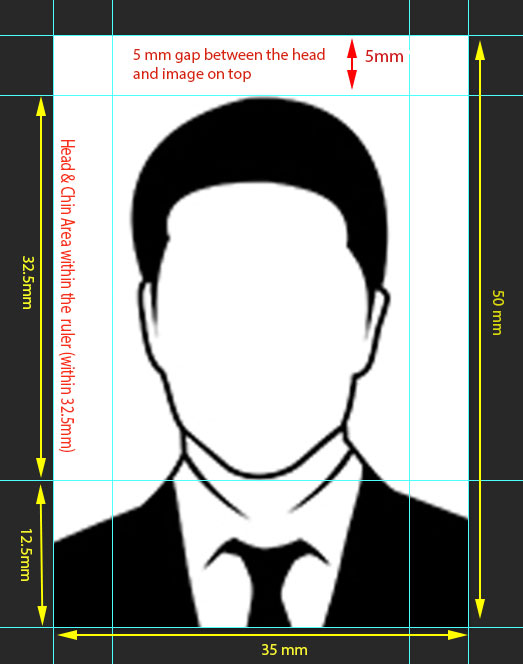
I created a photoshop frame and saved it as PSD, so that I can utilize whenever I require. All you have to simply do is simply us the PSD (photoshop) file and refer to the below image for reference to fit the photograph.
Please right-click above and “save as” to download the file.


Add comment